
Custom Designed Seven Segment Using LED
Led is a very basic component in the design and sometimes led does a lot more work than a just indication.
In this article, we will see how to build a custom-designed seven-segment display using led.
There are a lot of varieties of seven-segment in the market but I choose to build my own because I had the time and many LEDs laying around me.
I have used the Kicad tool for schematic and PCB designing.
Required Components
For this project we will need following components
1. LED (15 per segment x 4 Segements) = Total 60 LED’s.
2. Resistor 220 ohm = 7 Nos
3. Designed PCB


Schematic:

Explanation :
As you can see in the schematic we are using two led and one resistor for them which will limit the current.
and to turn on the two led we have to make the pin HIGH which will make the one segment ON.
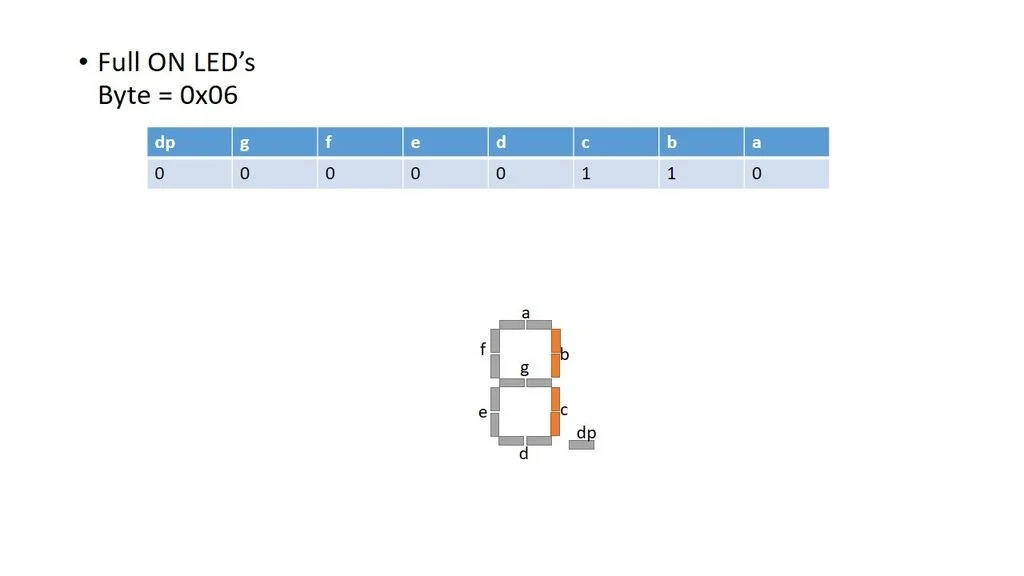
Likewise, as you can see in the first diagram i am making all the pins high and second diagram making all the pins as LOW.
To display number ‘1’: make the pins as HIGH which are connected to segments B and C.
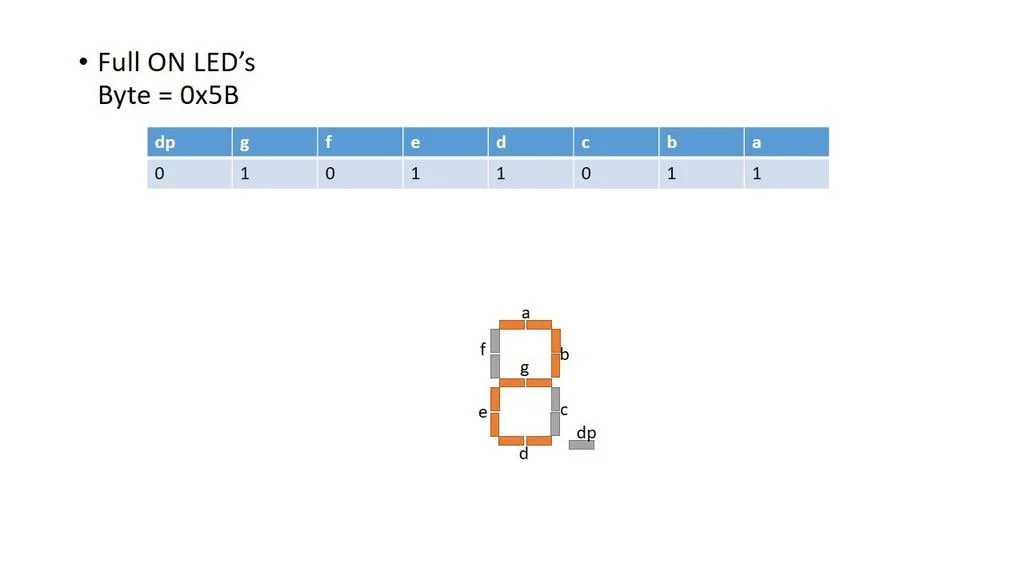
To display number ‘2’: make the pins as HIGHwhich are connected to segments B, D, E, G.
Code and Gerber Files
https://github.com/stechiez/electronicsDIY/tree/master/CustomSevenSegmentDisplay
Tutorial
Happy Coding.